Monday, 25 March 2013

RESTful Services With WCF in Asp.Net

What is REST
REST stands for Representational State Transfer. (It is sometimes spelled "ReST".) It relies on a stateless, client-server, cacheable communications protocol -- and in virtually all cases, the HTTP protocol is used.
REST is an architecture style for designing networked applications. The idea is that, rather than using complex mechanisms such as CORBA, RPC or SOAP to connect between machines, simple HTTP is used to make calls between machines.
  • In many ways, the World Wide Web itself, based on HTTP, can be viewed as a REST-based architecture.
RESTful applications use HTTP requests to post data (create and/or update), read data (e.g., make queries), and delete data. Thus, REST uses HTTP for all four CRUD (Create/Read/Update/Delete) operations.
Sample REST Application using WCF
WCF is the Microsoft framework for building applications that communicate over network using different protocols. WCF allows the developers to build distributed applications using SOAP. WCF also had the ability to expose and consume REST services.This post explains how to build REST service using WCF.
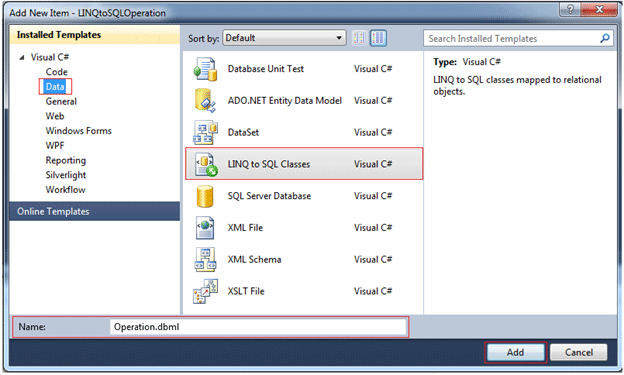
Create a new WCF Service in VS 2010 as follows,here select Web Location as Http.

Add the RestService.Svc  file to the solution Explorer .
When you add RestService.svc it will automatically adds IRestService.cs and RestService.cs files to your Solution Explorer

Add following methods in IRestService.cs File

[ServiceContract]
public interface IRestService
{
    [OperationContract]
   string HelloWorld();
    [OperationContract]
    string HelloWorldWithParameter(string input);
}

Add folowing NameSpaces and methods to the RestService Class

using System.ServiceModel.Web;
using System.ServiceModel.Activation;
[ServiceContract]
public class RestService
{
    [OperationContract]
    [WebGet(UriTemplate = "/Hello", ResponseFormat = WebMessageFormat.Xml)]
    string HelloWorld()
    {
        return "Welcome to My First Rest Service";
    }
   
    [OperationContract]
    [WebGet(UriTemplate = "/Hello/{input}", ResponseFormat = WebMessageFormat.Xml)]
    string HelloWorldWithParameter(string input)
    {
        return input;
    }
      
}

Here we can add WebFGet and WebInvoke attributes to the Methods and we can add WebMessage format as Json or Xml

WebGet
The WebGet attribute exposes operations using the GET verb. The GET has significant advantages over other HTTP verbs. First, the endpoint is directly accessible via a Web browser by typing the URI to the service into the address bar. Parameters can be sent within the URI either as query string parameters or embedded in the URI. Second, clients and other downstream systems such as proxy servers can easily cache resources based on the cache policy for the service. Because of the caching capability, the WebGet attribute should be used only for retrieval.
WebInvoke
The WebInvoke attribute exposes services using other HTTP verbs such as POST, PUT, and DELETE. The default is to use POST, but it can be changed by setting the Method property of the attribute. These operations are meant to modify resources; therefore, the WebInvoke attribute is used to make modifications to resources.


 Add the service host declaration with the following attributes

End Point Configuration in Web.config file
<system.serviceModel>
    <services>
      <service name="MyFirstRestWCFService.RestService" behaviorConfiguration="HttpGetMetadata">
        <endpoint address=""
                  binding="basicHttpBinding"
                  contract="MyFirstRestWCFService.IRestService" ></endpoint>
        <endpoint address="mex" binding="mexHttpBinding" contract="IMetadataExchange"></endpoint>
      </service>
    </services>
    <behaviors>
      <serviceBehaviors>
        <behavior name="HttpGetMetadata">
          <serviceMetadata httpGetEnabled="true" />
        </behavior>
      </serviceBehaviors>
    </behaviors>
    <serviceHostingEnvironment multipleSiteBindingsEnabled="true" />
  </system.serviceModel>


Now Enter this URL in your browser the output will display in XML format,because we have used WebMessage Format as Xml.
How to Consume REST-WCFServices
You can take advantage of the System.Net classes to programmatically issue HTTP requests and process the responses. The following code illustrates how easy this can be by using the HttpWebRequest and HttpWebResponse classes:
string uri = "http://localhost/MyFirstRestWCFService/RestService.svc/Hello";
            HttpWebRequest req = WebRequest.Create(uri) as HttpWebRequest;
            HttpWebResponse resp = req.GetResponse() as HttpWebResponse;
            Stream stream = resp.GetResponseStream();
            StreamReader reader = new StreamReader( stream );
            string text = reader.ReadToEnd();

Conclusion

Now We have learned how to Develop and consume REST Services using WCF.

Tuesday, 19 March 2013

ASP.NET - Custom Controls


ASP.Net allows the users to create controls. These user defined controls are categorized into:
  • User controls
  • Custom controls

     http://www.tutorialspoint.com/asp.net/asp.net_custom_controls.htm

User Controls:

User controls behaves like miniature ASP.Net pages, or web forms, which could be used by many other pages. These are derived from the System.Web.UI.UserControl class. These controls have the following characteristics.
  • They have an .ascx extension.
  • They may not contain any <html>, <body> or <form> tags.
  • They have a Control directive instead of a Page directive.
To understand the concept let us create a simple user control, which will work as footer for the web pages. To create and use the user control, take the following steps:
  • Create a new web application.
  • Right click on the project folder on the Solution Explorer and choose Add New Item.
Add New Item
Select Web User Control from the Add New Item dialog box and name it footer.ascx. Initially footer.ascx contains only a Control directive
<%@ Control Language="C#" AutoEventWireup="true" 
               CodeBehind="footer.ascx.cs" 
               Inherits="customcontroldemo.footer" %>
Add the following code to the file:
<table>
<tr>
<td align="center"> Copyright ©2010 TutorialPoints Ltd.</td>
</tr>
<tr>
<td align="center"> Location: Hyderabad, A.P </td>
</tr>
</table>
To add the user control to your web page, you must add the Register directive and an instance of the user control to the page. The following code shows the content file:
<%@ Page Language="C#" AutoEventWireup="true" 
         CodeBehind="Default.aspx.cs" 
         Inherits="customcontroldemo._Default" %>
<%@ Register Src="~/footer.ascx" 
             TagName="footer" TagPrefix="Tfooter" %>
<!DOCTYPE html PUBLIC "-//W3C//DTD XHTML 1.0 Transitional//EN" 
     "http://www.w3.org/TR/xhtml1/DTD/xhtml1-transitional.dtd">

<html xmlns="http://www.w3.org/1999/xhtml" >
<head runat="server">
    <title>Untitled Page</title>
</head>
<body>
    <form id="form1" runat="server">
    <div>
        <asp:Label ID="Label1" runat="server" 
         Text="Welcome to ASP.Net Tutorials "></asp:Label>
        <br />
        <br />
        <asp:Button ID="Button1" runat="server" 
        onclick="Button1_Click"  Text="Copyright Info" />
        
       </div>
       <Tfooter:footer ID="footer1" runat="server" />
    </form>
</body>
</html>
When executed, the page shows the footer and this control could be used in all the pages of your site.
Custom Result
Observe the following:
(1): The Register directive specifies a tag name as well as tag prefix for the control.
<%@ Register Src="~/footer.ascx" TagName="footer" 
                                    TagPrefix="Tfooter" %>
(2): This tag name and prefix should be used while adding the user control on the page:
<Tfooter:footer ID="footer1" runat="server" />

Custom Controls:

Custom controls are deployed as individual assemblies. They are compiled into a dynamic link library (DLL) and used as any other ASP.Net server control. They could be created in either of the following way:
  • By deriving a custom control from an existing control
  • By composing a new custom control combing two or more existing controls
  • By deriving from the base control class
To understand the concept, let us create a custom control, which will simply render a text message on the browser. To create this control, take the following steps:
Create a new website. Right click the solution (not the project) at the top of the tree in the Solution Explorer.
Solution Explorer
In the New Project dialog box, select ASP.Net Server Control from the project templates.
project templates
The above step adds a new project and creates a complete custom control to the solution, called ServerControl1. In this example, let us name the project CustomControls. To use this control, this must be added as a reference to the web site before registering it on a page. To add a reference to the existing project, right click on the project (not the solution), and click Add Reference.
Select the CustomControls project from the Projects tab of the Add Reference dialog box. The Solution Explorer should show the reference.
Custom Controls
To use the control on a page, add the Register directive just below the @Page directive:
<%@ Register Assembly="CustomControls"  
                Namespace="CustomControls" 
                TagPrefix="ccs" %>
Next you can use the control, like any other controls.
<form id="form1" runat="server">
    <div>
    <ccs:ServerControl1 runat="server" 
    Text = "I am a Custom Server Control" />
    </div> 
</form>
When executed the Text property of the control is rendered on the browser:
Custom Server Controls

Working with a Custom Control:

In the previous example, the value for the Text property of the custom control was set. ASP.Net added this property by default, when the control was created. The code behind file of the control will reveal this:
using System;
using System.Collections.Generic;
using System.ComponentModel;
using System.Linq;
using System.Text;
using System.Web;
using System.Web.UI;
using System.Web.UI.WebControls;

namespace CustomControls
{
   [DefaultProperty("Text")]
   [ToolboxData("<{0}:ServerControl1 
                  runat=server></{0}:ServerControl1>")]
    public class ServerControl1 : WebControl
   {
      [Bindable(true)]
      [Category("Appearance")]
      [DefaultValue("")]
      [Localizable(true)]
      public string Text
      {
         get
         {
            String s = (String)ViewState["Text"];
            return ((s == null) ? "[" + this.ID + "]" : s);
         }
         set
         {
            ViewState["Text"] = value;
         }
      }
      protected override void RenderContents(
                                        HtmlTextWriter output)
      {
         output.Write(Text);
      }
   }
}
The above code is automatically generated for a custom control. Events and methods could be added to the custom control class.

Example:

Let us expand the previous custom control named SeverControl1. Let us give it a method named ‘checkpalindrome’, which will give it a power to check for palindromes.
Palindromes are words/literals that spell the same when reversed. We will consider simple words for this example.
Extend the code for the custom control, which should look as:
using System;
using System.Collections.Generic;
using System.ComponentModel;
using System.Linq;
using System.Text;
using System.Web;
using System.Web.UI;
using System.Web.UI.WebControls;

namespace CustomControls
{
   [DefaultProperty("Text")]
   [ToolboxData("<{0}:ServerControl1 
               runat=server></{0}:ServerControl1>")]
   public class ServerControl1 : WebControl
   {
      [Bindable(true)]
      [Category("Appearance")]
      [DefaultValue("")]
      [Localizable(true)]
      public string Text
      {
         get
         {
            String s = (String)ViewState["Text"];
            return ((s == null) ? "[" + this.ID + "]" : s);
         }
         set
         {
            ViewState["Text"] = value;
         }
     }
     protected override void RenderContents(
                                       HtmlTextWriter output)
     {
        if (this.checkpanlindrome())
        {
           output.Write("This is a palindrome: <br />");
           output.Write("<FONT size=5 color=Blue>");
           output.Write("<B>");
           output.Write(Text);
           output.Write("</B>");
           output.Write("</FONT>");
        }
        else
       {
          output.Write("This is not a palindrome: <br />");
          output.Write("<FONT size=5 color=red>");
          output.Write("<B>");
          output.Write(Text);
          output.Write("</B>");
          output.Write("</FONT>");
       }
    }
    protected bool checkpanlindrome()
    {
       if (this.Text != null)
       {
          String str = this.Text;
          String strtoupper = Text.ToUpper();
          char[] rev = strtoupper.ToCharArray();
          Array.Reverse(rev);
          String strrev = new String(rev);
          if (strtoupper == strrev)
          {
             return true;
          }
          else{
             return false;
          }
       }
       else
       {
          return false;
       }
    }
  }
}
When you change the code for the control, you must build the solution by clicking Build --> Build Solution, so that the changes are reflected in your project. Add a text box and a button control to the page, so that the user can provide a text, it is checked for palindrome, when the button is clicked.
<form id="form1" runat="server">
<div>
   Enter a word:
   <br />
   <asp:TextBox ID="TextBox1" runat="server" Width="198px">
   </asp:TextBox>
   <br />
   <br />
   <asp:Button ID="Button1" runat="server" 
               onclick="Button1_Click" 
               Text="Check Palindrome" Width="132px" />
   <br />
   <br />
   <ccs:ServerControl1 ID="ServerControl11" 
               runat="server" Text = "" />
</div>
</form>
The Click event handler for the button simply copies the text from the text box to the text property of the custom control.
protected void Button1_Click(object sender, EventArgs e)
{
     this.ServerControl11.Text = this.TextBox1.Text;
}
When executed, the control successfully checks palindromes.
checks palindromes
Observe the following:
(1) When you add a reference to the custom control, it is added to the toolbox and you can directly use it from the toolbox like any other control.
custom control reference
(2) The RenderContents method of the custom control class has been overridden here; you can add your own methods and events.
(3) The RenderContents method takes a parameter of HtmlTextWriter type, which is responsible for rendering on the browser.

Sunday, 10 March 2013

Exception Handling in SQL Server Stored Procedure with TRY CATCH

Introduction:

Here I will explain how to handle exceptions in SQL Server or exception handling in SQL Server for stored procedure by using try catch or error handling in SQL Server.

Description:
 
In previous articles I explained Pass table as parameter to stored procedure in SQL Server, Difference between joins in SQL Server, Convert rows to columns in SQL Server, SQL Query to get duplicate records count and many articles relating to SQL Server, jQuery, JavaScript. Now I will explain how to handle exceptions in SQL Server.

To handle exceptions in SQL Server we can use TRY…… CATCH blocks. To use TRY…… CATCH blocks in stored procedure we need to write the query like as shown below


BEGIN TRY
---Write Your Code
END TRY
BEGIN CATCH
---Write Code to handle errors
END CATCH
In TRY block we will write our queries and in CATCH block we will write code to handle exceptions. In our SQL statements if any error occurs automatically it will move to CATCH block in that we can handle error messages. To handle error messages we have defined Error Functions in CATCH block those are

ERROR_LINE() - This function will return error line number of SQL query which cause to raise error.

ERROR_NUMBER() - This function will return error number which is unique and assigned to it.

ERROR_SEVERITY() - This function will return severity of error which indicates how serious the error is. The values are between 1 and 25.

ERROR_STATE() - This function will return state number of error message which cause to raise error.

ERROR_PROCEDURE() - This function will return name of the procedure where an error occurred.

ERROR_MESSAGE() - This function will return the complete text of the error message which cause to raise error.

Check below sample query to handle errors in stored procedure


BEGIN TRY
SELECT 300/0
END TRY
BEGIN CATCH
SELECT ErrorNumber = ERROR_NUMBER(), ErrorSeverity = ERROR_SEVERITY(), ErrorState = ERROR_STATE(),
ErrorProcedure = ERROR_PROCEDURE(), ErrorLine = ERROR_LINE(), ErrorMessage = ERROR_MESSAGE()
END CATCH
If we run above query we will get output like as shown below

Output

Tuesday, 5 March 2013

LINQ Concepts like SELECT, INSERT, UPDATE and DELETE Using LINQ to SQL

Language-INtegrated Query (LINQ) is a Microsoft .NET Framework component that adds native data querying capabilities to .NET languages. In other words LINQ has the power of querying on any source of data (Collection of objects, database tables or XML Files). We can easily retrieve data from any object that implements the IEnumerable<T> interface and any provider that implements the IQueryable<T> interface.

Microsoft basically divides LINQ into the following three areas:

LINQ to Object : Queries performed against in-memory data
LINQ to ADO.Net
LINQ to SQL (formerly DLinq) : Queries performed against the relation database; only Microsoft SQL Server is supported.
LINQ to DataSet : Supports queries by using ADO.NET data sets and data tables.
LINQ to Entities : Microsoft ORM solution
LINQ to XML (formerly XLinq) : Queries performed against the XML source.


LINQ to SQL translates our actions to SQL and submits the changes to the database. Here we will perform Select, Insert, Update and Delete operations on a COURSE table.

Step 1: Create a COURSE Table in the database


Step 2: Create a ContextData file using the Object Relational Designer:

Create a new item, select the LINQ to SQL classes (as shown in the following figure) and name it Operation.dbml.


After clicking the Add button the ContextData file is created. Now we should drag all the tables onto the left-hand side of the designer and save (as shown in the following figure). This will create all the mappings and settings for each table and their entities.


For .dbml files the database connection string is defined in the web.config file as:

<connectionStrings>
<add name="DevelopmentConnectionString" connectionString="Data Source=sandeepss-PC;Initial Catalog=Development;User ID=sa;
Password=*******" providerName="System.Data.SqlClient" />
 </connectionStrings>

We can use a connection string from the web.config file or we can pass a connection string as a parameter in the constructor of the DataContext class to create an object of the DataContext class.

The SELECT Operation

private void GetCourses()
{
      //create DataContext object
      OperationDataContext OdContext = new OperationDataContext();
      var courseTable = from course in OdContext.GetTable<COURSE>() select course;
      //grdCourse is gridview id
      grdCourse.DataSource = courseTable;
      grdCourse.DataBind();
}

The INSERT Operation

private void AddNewCourse()
{
      //Data maping object to our database
      OperationDataContext OdContext = new OperationDataContext();
      COURSE objCourse = new COURSE();
      objCourse.course_name = "B.Tech";
      objCourse.course_desc = "Bachelor Of Technology";
      objCourse.modified_date = DateTime.Now;
      //Adds an entity in a pending insert state to this System.Data.Linq.Table<TEntity>and parameter is the entity which to be added
      OdContext.COURSEs.InsertOnSubmit(objCourse);
      // executes the appropriate commands to implement the changes to the database
      OdContext.SubmitChanges();
}

The Update Operation

private void UpdateCourse()
{
      OperationDataContext OdContext = new OperationDataContext();
      //Get Single course which need to update
      COURSE objCourse = OdContext.COURSEs.Single(course => course.course_name == "B.Tech");
      //Field which will be update
      objCourse.course_desc = "Bachelor of Technology";
      // executes the appropriate commands to implement the changes to the database
      OdContext.SubmitChanges();
 }

The DELETE Operation

private void DeleteCourse()
{
      OperationDataContext OdContext = new OperationDataContext();
      //Get Single course which need to Delete
      COURSE objCourse = OdContext.COURSEs.Single(course => course.course_name == "B.Tech");
      //Puts an entity from this table into a pending delete state and parameter is the entity which to be deleted.
      OdContext.COURSEs.DeleteOnSubmit(objCourse);
      // executes the appropriate commands to implement the changes to the database
      OdContext.SubmitChanges();
}

Conculsion

To perform select, insert, update and delete operations we create a table and create a data context class; in other words a dbml file. In this file designer view we drag and drop the COURSE table from the Server Explorer. This data context class is an Object and table mapping and we perform the operation on the object and database updated according to the action using the submitChanges() method.

Sunday, 3 March 2013

Simple login form example in asp.net Check Username and Password availability in database

Introduction

In this post I will explain how to implement simple login form using asp.net and I will explain how to Check Username and Password Exists in database using asp.net .

Description: 

One day I got mail from one of the reader he has asked about how to implement simple login form to check username and password details of user in database. If user details exist in database then we need to redirect user to welcome page otherwise we need to display “Invalid Username/Password”. Mostly it’s common for all the websites before access the website. I know that many of them feel it’s very easy but for the people who have started learning .NET they don’t know how to implement this because of that I decided to write post to help for the persons who is in need with this requirement. 

To implement this one first design table like this

ColumnName
DataType
UserId
Int(set identity property=true)
UserName
varchar(50)
Password
varchar(50)
FirstName
varchar(50)
LastName
varchar(50)

After completion of table creation enter some dummy data or use this link to create user registration form to insert userdetails in database.

Once data entered in table design your aspx page like this

<html xmlns="http://www.w3.org/1999/xhtml">
<head runat="server">
<title>Login Form</title>
</head>
<body>
<form id="form1" runat="server">
<div>
<table>
<tr>
<td>
Username:
</td>
<td>
<asp:TextBox ID="txtUserName" runat="server"/>
<asp:RequiredFieldValidator ID="rfvUser" ErrorMessage="Please enter Username" ControlToValidate="txtUserName" runat="server" />
</td>
</tr>
<tr>
<td>
Password:
</td>
<td>
<asp:TextBox ID="txtPWD" runat="server" TextMode="Password"/>
<asp:RequiredFieldValidator ID="rfvPWD" runat="server" ControlToValidate="txtPWD" ErrorMessage="Please enter Password"/>
</td>
</tr>
<tr>
<td>
</td>
<td>
<asp:Button ID="btnSubmit" runat="server" Text="Submit" onclick="btnSubmit_Click" />
</td>
</tr>
</table>
</div>
</form>
</body>
</html>
After that add the following namespaces in code behind

C# Code
using System;
using System.Data;
using System.Data.SqlClient;
using System.Configuration;
After add namespaces write the following code in code behind
protected void btnSubmit_Click(object sender, EventArgs e)
{
SqlConnection con = new SqlConnection(ConfigurationManager.ConnectionStrings["dbconnection"].ConnectionString);
con.Open();
SqlCommand cmd = new SqlCommand("select * from UserInformation where UserName =@username and Password=@password",con);
cmd.Parameters.AddWithValue("@username", txtUserName.Text);
cmd.Parameters.AddWithValue("@password", txtPWD.Text);
SqlDataAdapter da = new SqlDataAdapter(cmd);
DataTable dt = new DataTable();
da.Fill(dt);
if(dt.Rows.Count>0)
{
Response.Redirect("Details.aspx");
}
else
{
ClientScript.RegisterStartupScript(Page.GetType(), "validation", "<script language='javascript'>alert('Invalid Username and Password')</script>");
}
}

VB.NET Code
Imports System.Data
Imports System.Data.SqlClient
Imports System.Configuration
Partial Class _Default
Inherits System.Web.UI.Page
Protected Sub Page_Load(ByVal sender As Object, ByVal e As EventArgs)
End Sub
Protected Sub btnSubmit_Click(ByVal sender As Object, ByVal e As EventArgs)
Dim con As New SqlConnection(ConfigurationManager.ConnectionStrings("dbconnection").ConnectionString)
con.Open()
Dim cmd As New SqlCommand("select * from UserInformation where UserName =@username and Password=@password", con)
cmd.Parameters.AddWithValue("@username", txtUserName.Text)
cmd.Parameters.AddWithValue("@password", txtPWD.Text)
Dim da As New SqlDataAdapter(cmd)
Dim dt As New DataTable()
da.Fill(dt)
If dt.Rows.Count > 0 Then
Response.Redirect("Details.aspx")
Else
ClientScript.RegisterStartupScript(Page.[GetType](), "validation", "<script language='javascript'>alert('Invalid Username and Password')</script>")
End If
End Sub
End Class

Here don’t forgot to set the connection string in web.config file here I am getting database connection from web.config file for that reason you need to set the connectionstring in web.config file like this
<connectionStrings>
<add name="dbconnection" connectionString="Data Source=SureshDasari;Integrated Security=true;Initial Catalog=MySampleDB"/>
</connectionStrings>